If you want to understand how to easily ingest data from Kafka topics into Cassandra than this blog can show you how with the DataStax Kafka Connector.

The post Getting started with Kafka Cassandra Connector appeared first on digitalis.io.
]]>This blog provides step by step instructions on using Kafka Connect with Apache Cassandra. It provides a fully working docker-compose project on Github allowing you to explore the various features and options available to you.
If you would like to know more about how to implement modern data and cloud technologies into to your business, we at Digitalis do it all: from cloud and Kubernetes migration to fully managed services, we can help you modernize your operations, data, and applications – on-premises, in the cloud and hybrid.
We provide consulting and managed services on wide variety of technologies including Apache Cassandra and Apache Kafka.
Contact us today for more information or to learn more about each of our services.
Kafka Connect streams data between Apache Kafka and other data systems. Kafka Connect can copy data from applications to Kafka topics for stream processing. Additionally data can be copied from Kafka topics to external data systems like Elasticsearch, Cassandra and lots of others. There is a wide set of pre-existing Kafka Connectors for you to use and its straightforward to build your own.
If you have not come across it before, here is an introductory video from Confluent giving you an overview of Kafka Connect.
Kafka connect can be run either standalone mode for quick testing or development purposes or can be run distributed mode for scalability and high availability.
As mentioned above, Kafka Connect can be used for copying data from Kafka to Cassandra. DataStax Apache Kafka Connector is an open-source connector for copying data to Cassandra tables.
The diagram below illustrates how the Kafka Connect fits into the ecosystem. Data is published onto Kafka topics and then it is consumed and inserted into Apache Cassandra by Kafka Connect.

The DataStax Apache Kafka Connector can be used to push data to the following databases:
Kafka Connect workers can run one or more Cassandra connectors and each one creates a DataStax java driver session. A single connector can consume data from multiple topics and write to multiple tables. Multiple connector instances are required for scenarios where different global connect configurations are required such as writing to different clusters, data centers etc.
The DataStax connector gives you several option on how to configure it to map data on the topics to Cassandra tables.
The options below explain how each mapping option works.
Note – in all cases. you should ensure that the data types of the message field are compatible with the data type of the target table column.
This option maps the data key and the value to the Cassandra table columns. See here for more detail.
This option maps the individual fields in the data key or value JSON to Cassandra table fields. See here for more detail.
This option maps the individual fields in the data key or value JSON to Cassandra table fields. See here for more detail.
All required files are in https://github.com/digitalis-io/kafka-connect-cassandra-blog. Just clone the repo to get started.
The examples are using docker and docker-compose .It is easy to use docker and docker-compose for testing locally. Installation instructions for docker and docker-compose can be found here:
The example on github will start up containers running everything needed in this blog – Kafka, Cassandra, Connect etc..
The following resources are defined in the projects docker-compose.yml file:
This section of the blog will take you through the fully working deployment defined in the docker-compose.yml file used to start up Kafka, Cassandra and Connect.
networks:
 kafka-net:
driver: bridgeApache Zookeeper is (currently) an integral part of the Kafka deployment which keeps track of the Kafka nodes, topics etc. We are using the confluent docker image (confluentinc/cp-zookeeper) for Zookeeper.
zookeeper-server:
   image: 'confluentinc/cp-zookeeper:latest'
   container_name: 'zookeeper-server'
   hostname: 'zookeeper-server'
   healthcheck:
     test: ["CMD-SHELL", "nc -z localhost 2181 || exit 1" ]
     interval: 5s
     timeout: 5s
     retries: 60
   networks:
     - kafka-net
   ports:
     - '2181:2181'
   environment:
     - ZOOKEEPER_CLIENT_PORT=2181
     - ZOOKEEPER_SERVER_ID=1
Kafka brokers store topics and messages. We are using the confluentinc/cp-kafka docker image for this.
As Kafka brokers in this setup of Kafka depend on Zookeeper, we instruct docker-compose to wait for Zookeeper to be up and running before starting the brokers. This is defined in the depends_on section.
kafka-server1:
   image: 'confluentinc/cp-kafka:latest'
   container_name: 'kafka-server1'
   hostname: 'kafka-server1'
   healthcheck:
     test: ["CMD-SHELL", "nc -z localhost 9092 || exit 1" ]
     interval: 5s
     timeout: 5s
     retries: 60
   networks:
     - kafka-net
   ports:
     - '9092:9092'
   environment:
     - KAFKA_ZOOKEEPER_CONNECT=zookeeper-server:2181
     - KAFKA_ADVERTISED_LISTENERS=PLAINTEXT://kafka-server1:9092
     - KAFKA_BROKER_ID=1
   depends_on:
     - zookeeper-server

 kafka-server2:
   image: 'confluentinc/cp-kafka:latest'
   container_name: 'kafka-server2'
   hostname: 'kafka-server2'
   healthcheck:
     test: ["CMD-SHELL", "nc -z localhost 9092 || exit 1" ]
     interval: 5s
     timeout: 5s
     retries: 60
   networks:
     - kafka-net
   ports:
     - '9093:9092'
   environment:
     - KAFKA_ZOOKEEPER_CONNECT=zookeeper-server:2181
     - KAFKA_ADVERTISED_LISTENERS=PLAINTEXT://kafka-server2:9092
     - KAFKA_BROKER_ID=2
   depends_on:
     - zookeeper-server

 kafka-server3:
   image: 'confluentinc/cp-kafka:latest'
   container_name: 'kafka-server3'
   hostname: 'kafka-server3'
   healthcheck:
     test: ["CMD-SHELL", "nc -z localhost 9092 || exit 1" ]
     interval: 5s
     timeout: 5s
     retries: 60
   networks:
     - kafka-net
   ports:
     - '9094:9092'
   environment:
     - KAFKA_ZOOKEEPER_CONNECT=zookeeper-server:2181
     - KAFKA_ADVERTISED_LISTENERS=PLAINTEXT://kafka-server3:9092
     - KAFKA_BROKER_ID=3
   depends_on:
     - zookeeper-server
Schema registry is used for storing schemas used for the messages encoded in AVRO, Protobuf and JSON.
The confluentinc/cp-schema-registry docker image is used.
 kafka-sr1:
   image: 'confluentinc/cp-schema-registry:latest'
   container_name: 'kafka-sr1'
   hostname: 'kafka-sr1'
   healthcheck:
     test: ["CMD-SHELL", "nc -z kafka-sr1 8081 || exit 1" ]
     interval: 5s
     timeout: 5s
     retries: 60
   networks:
     - kafka-net
   ports:
     - '8081:8081'
   environment:
     - SCHEMA_REGISTRY_KAFKASTORE_BOOTSTRAP_SERVERS=kafka-server1:9092,kafka-server2:9092,kafka-server3:9092
     - SCHEMA_REGISTRY_HOST_NAME=kafka-sr1
     - SCHEMA_REGISTRY_LISTENERS=http://kafka-sr1:8081
   depends_on:
     - zookeeper-server
Kafka connect writes data to Cassandra as explained in the previous section.
 kafka-connect1:
   image: 'confluentinc/cp-kafka-connect:latest'
   container_name: 'kafka-connect1'
   hostname: 'kafka-connect1'
   healthcheck:
     test: ["CMD-SHELL", "nc -z localhost 8082 || exit 1" ]
     interval: 5s
     timeout: 5s
     retries: 60
   networks:
     - kafka-net
   ports:
     - '8082:8082'
   volumes:
     - ./vol-kafka-connect-jar:/etc/kafka-connect/jars
     - ./vol-kafka-connect-conf:/etc/kafka-connect/connectors
   environment:
     - CONNECT_BOOTSTRAP_SERVERS=kafka-server1:9092,kafka-server2:9092,kafka-server3:9092
     - CONNECT_REST_PORT=8082
     - CONNECT_GROUP_ID=cassandraConnect
     - CONNECT_CONFIG_STORAGE_TOPIC=cassandraconnect-config
     - CONNECT_OFFSET_STORAGE_TOPIC=cassandraconnect-offset
     - CONNECT_STATUS_STORAGE_TOPIC=cassandraconnect-status
     - CONNECT_KEY_CONVERTER=org.apache.kafka.connect.json.JsonConverter
     - CONNECT_VALUE_CONVERTER=org.apache.kafka.connect.json.JsonConverter
     - CONNECT_INTERNAL_KEY_CONVERTER=org.apache.kafka.connect.json.JsonConverter
     - CONNECT_INTERNAL_VALUE_CONVERTER=org.apache.kafka.connect.json.JsonConverter
     - CONNECT_KEY_CONVERTER_SCHEMAS_ENABLE=false
     - CONNECT_VALUE_CONVERTER_SCHEMAS_ENABLE=false
     - CONNECT_REST_ADVERTISED_HOST_NAME=kafka-connect
     - CONNECT_PLUGIN_PATH=/etc/kafka-connect/jars
   depends_on:
     - zookeeper-server
     - kafka-server1
     - kafka-server2
- kafka-server3cassandra-server1:
image: cassandra:latest
mem_limit: 2g
container_name: 'cassandra-server1'
hostname: 'cassandra-server1'
healthcheck:
test: ["CMD-SHELL", "cqlsh", "-e", "describe keyspaces" ]
interval: 5s
timeout: 5s
retries: 60
networks:
- kafka-net
ports:
- "9042:9042"
environment:
- CASSANDRA_SEEDS=cassandra-server1
- CASSANDRA_CLUSTER_NAME=Digitalis
- CASSANDRA_DC=DC1
- CASSANDRA_RACK=rack1
- CASSANDRA_ENDPOINT_SNITCH=GossipingPropertyFileSnitch
- CASSANDRA_NUM_TOKENS=128As you may have already noticed, we have defined two docker volumes for the Kafka Connect service in the docker-compose.yml. The first one is for the Cassandra Connector jar and the second volume is for the connector configuration.
We will need to configure the Cassandra connection, the source topic for Kafka Connect to consume messages from and the mapping of the message payloads to the target Cassandra table.
First thing we need to do is download the connector tarball file from DataStax website: https://downloads.datastax.com/#akc and then extract its contents to the vol-kafka-connect-jar folder in the accompanying github project. If you have not checked out the project, do this now.
Once you have download the tarball, extract its contents:
$ tar -zxf kafka-connect-cassandra-sink-1.4.0.tar.gz
Copy kafka-connect-cassandra-sink-1.4.0.jar to vol-kafka-connect-jar folder
$ cp kafka-connect-cassandra-sink-1.4.0/kafka-connect-cassandra-sink-1.4.0.jar vol-kafka-connect-jar
Go to the base directory of the checked out project and let’s start the containers up
$ docker-compose up -d


We now have Apache Cassandra, Apache Kafka and Connect all up and running via docker and docker-compose on your local machine.
You may follow the container logs and check for any errors using the following command:
$ docker-compose logs -f
The next thing we need to do is connect to our docker deployed Cassandra DB and create a keyspace and table for our Kafka connect to use.
Connect to the cassandra container and create a keyspace via cqlsh
$ docker exec -it cassandra-server1 /bin/bash
$ cqlsh -e “CREATE KEYSPACE connect WITH replication = {‘class’: ‘NetworkTopologyStrategy’,’DC1′: 1};”


We need to create the basic connector using the basic-connect.json configuration which is mounted at /etc/kafka-connect/connectors/conf/basic-connect.json within the container
$ curl -X POST -H “Content-Type: application/json” -d “@/etc/kafka-connect/connectors/conf/basic-connect.json” “http://localhost:8082/connectors”
basic-connect.json contains the following configuration:
{
  "name": "cassandra-basic-sink", #name of the sink
  "config": {
      "connector.class": "com.datastax.oss.kafka.sink.CassandraSinkConnector", #connector class
      "tasks.max": "1", #max no of connect tasks
      "topics": "basic_topic", #kafka topic
      "contactPoints": "cassandra-server1", #cassandra cluster node
      "loadBalancing.localDc": "DC1", #cassandra DC name
      "topic.basic_topic.connect.basic_table.mapping": "userid=key, username=value", #topic to table mapping
      "key.converter": "org.apache.kafka.connect.storage.StringConverter", #use string converter for key
      "value.converter": "org.apache.kafka.connect.storage.StringConverter", #use string converter for values
      "key.converter.schemas.enable": false,  #no schema in data for the key
      "value.converter.schemas.enable": false  #no schema in data for value
  }
}
Here the key is mapped to the userid column and the value is mapped to the username column i.e
“topic.basic_topic.connect.basic_table.mapping”: “userid=key, username=value”
Both the key and value are expected in plain text format as specified in the key.converter and the value.converter configuration.
We can check status of the connector via the Kafka connect container and make sure the connector is running with the command:
$ curl -X GET “http://localhost:8082/connectors/cassandra-basic-sink/status”


First lets create another table to store the data:
$ docker exec -it cassandra-server1 /bin/bash
$ cqlsh -e “CREATE TABLE connect.json_table (userid text PRIMARY KEY, username text, firstname text, lastname text);”

Connect to one of the Kafka brokers to create a new topic
$ docker exec -it kafka-server1 /bin/bash
$ kafka-topics –create –topic json_topic –zookeeper zookeeper-server:2181 –partitions 3 –replication-factor 3

Create the connector using the json-connect.json configuration which is mounted at /etc/kafka-connect/connectors/conf/json-connect.json on the container
$ curl -X POST -H “Content-Type: application/json” -d “@/etc/kafka-connect/connectors/conf/json-connect.json” “http://localhost:8082/connectors”
Connect config has following values
{
   "name": "cassandra-json-sink",
   "config": {
       "connector.class": "com.datastax.oss.kafka.sink.CassandraSinkConnector",
       "tasks.max": "1",
       "topics": "json_topic",
       "contactPoints": "cassandra-server1",
       "loadBalancing.localDc": "DC1",
       "topic.json_topic.connect.json_table.mapping": "userid=key, username=value.username, firstname=value.firstname, lastname=value.lastname",
       "key.converter": "org.apache.kafka.connect.storage.StringConverter",
       "key.converter.schemas.enable": false,
       "value.converter.schemas.enable": false
   }
}
Check status of the connector and make sure the connector is running
$ docker exec -it kafka-connect1 /bin/bash
$ curl -X GET “http://localhost:8082/connectors/cassandra-json-sink/status”

Now lets connect to one of the broker nodes, generate some JSON data and then inject it into the topic we created
$ docker exec -it kafka-server1 /bin/bash
$ echo ‘abc:{“username”: “fbar”, “firstname”: “foo”, “lastname”: “bar”}’ > data.json
$ kafka-console-producer –broker-list localhost:9092 –topic json_topic –property parse.key=true –property key.separator=: < data.json


First lets create a table to store the data:
$ docker exec -it cassandra-server1 /bin/bash
$ cqlsh -e “CREATE TABLE connect.avro_table (userid uuid PRIMARY KEY, username text, firstname text, lastname text);”


{
   "name": "cassandra-avro-sink",
   "config": {
       "connector.class": "com.datastax.oss.kafka.sink.CassandraSinkConnector",
       "tasks.max": "1",
       "topics": "avro_topic",
       "contactPoints": "cassandra-server1",
       "loadBalancing.localDc": "DC1",
       "topic.avro_topic.connect.avro_table.mapping": "userid=now(), username=value.username, firstname=value.firstname, lastname=value.lastname",
       "key.converter": "org.apache.kafka.connect.storage.StringConverter",
       "key.converter.schema.registry.url":"kafka-sr1:8081",
       "value.converter": "io.confluent.connect.avro.AvroConverter",
       "value.converter.schema.registry.url":"http://kafka-sr1:8081",
       "key.converter.schemas.enable": false,
       "value.converter.schemas.enable": false
   }
}


First thing to do is to create another table for the data
$ docker exec -it cassandra-server1 /bin/bash
$ cqlsh -e “CREATE TABLE connect.cql_table (userid uuid PRIMARY KEY, username text, firstname text, lastname text);”


Here the file cql-connect.json contains the connect configuration:
{
	"name": "cassandra-cql-sink",
	"config": {
		"connector.class": "com.datastax.oss.kafka.sink.CassandraSinkConnector",
		"tasks.max": "1",
		"topics": "cql_topic",
		"contactPoints": "cassandra-server1",
		"loadBalancing.localDc": "DC1",
		"topic.cql_topic.connect.cql_table.mapping": "id=now(), username=value.username, firstname=value.firstname, lastname=value.lastname",
		"topic.cql_topic.connect.cql_table.query": "INSERT INTO connect.cql_table (userid, username, firstname, lastname) VALUES (:id, :username, :firstname, :lastname)",
		"topic.cql_topic.connect.cql_table.consistencyLevel": "LOCAL_ONE",
        "topic.cql_topic.connect.cql_table.deletesEnabled": false,
        "key.converter.schemas.enable": false,
        "value.converter.schemas.enable": false
	}
}$ curl -X POST -H “Content-Type: application/json” -d “@/etc/kafka-connect/connectors/conf/cql-connect.json” “http://localhost:8082/connectors”
Check status of the connector and make sure the connector is running
$ curl -X GET “http://localhost:8082/connectors/cassandra-cql-sink/status”


The uuid will be generated using the now() function which returns TIMEUUID.
The following data will be inserted to the table and the result can be confirmed by running a select cql query on the connect.cql_table from the cassandra node.
$ docker exec -it cassandra-server1 /bin/bash
$ cqlsh -e “select * from connect.cql_table;”

Kafka connect is a scalable and simple framework for moving data between Kafka and other data systems. It is a great tool for easily wiring together and when you combined Kafka with Cassandra you get an extremely scalable, available and performant system.
Kafka Connector reliably streams data from Kaka topics to Cassandra. This blog just covers how to install and configure Kafka connect for testing and development purposes. Security and scalability is out of scope of this blog.
More detailed information about Apache Kafka Connector can be found at https://docs.datastax.com/en/kafka/doc/kafka/kafkaIntro.html
At Digitalis we have extensive experience dealing with Cassandra and Kafka in complex and critical environments. We are experts in Kubernetes, data and streaming along with DevOps and DataOps practices. If you could like to know more, please let us know.
If you want to understand how to easily ingest data from Kafka topics into Cassandra than this blog can show you how with the DataStax Kafka Connector.

If you want to understand what Apache NiFi is, this blog will give you an overview of its architecture, components and security features.
This blog describes some of the main differences between Apache Kafka and Pulsar – two of the leading data streaming Apache projects.
The post Getting started with Kafka Cassandra Connector appeared first on digitalis.io.
]]>The post Cassandra with AxonOps on Kubernetes appeared first on digitalis.io.
]]>The following shows how to install AxonOps for monitoring Cassandra. This process specifically requires the official cassandra helm repository.
The deployment should work fine on latest versions of minikube as long as you provide enough memory for it.
minikube start --memory 8192 --cpus=4
minikube addons enable storage-provisioner
⚠️ Make sure you use a recent version of minikube. Also check available drivers and select the most appropriate for your platform
As this deployment contains multiple applications we recommend you use an automation system such as Ansible or Helmfile to put together the config. The example below uses helmfile.
You would need to install the following components:
Alternatively you can consider using a dockerized version of them both such as https://hub.docker.com/r/chatwork/helmfile
The values below are set for running on a laptop with minikube, adjust accordingly for larger deployments.
The values below are set for running on a laptop with minikube, adjust accordingly for larger deployments.
---
repositories:
  - name: stable
    url: https://kubernetes-charts.storage.googleapis.com
  - name: incubator
    url: https://kubernetes-charts-incubator.storage.googleapis.com
  - name: axonops-helm
    url: https://repo.axonops.com/public/helm/helm/charts/
  - name: bitnami
    url: https://charts.bitnami.com/bitnami
releases:
  - name: axon-elastic
    namespace: {{ env "NAMESPACE" | default "monitoring" }}
    chart: "bitnami/elasticsearch"
    wait: true
    labels:
      env: minikube
    values:
      - fullnameOverride: axon-elastic
      - imageTag: "7.8.0"
      - data:
          replicas: 1
          persistence:
            size: 1Gi
            enabled: true
            accessModes: [ "ReadWriteOnce" ]
      - curator:
          enabled: true
      - coordinating:
          replicas: 1
      - master:
          replicas: 1
          persistence:
            size: 1Gi
            enabled: true
            accessModes: [ "ReadWriteOnce" ]

  - name: axonops
    namespace: {{ env "NAMESPACE" | default "monitoring" }}
    chart: "axonops-helm/axonops"
    wait: true
    labels:
      env: minikube
    values:
      - values.yaml

  - name: cassandra
    namespace: cassandra
    chart: "incubator/cassandra"
    wait: true
    labels:
      env: dev
    values:
- values.yaml---
persistence:
enabled: true
size: 1Gi
accessMode: ReadWriteMany
podSettings:
terminationGracePeriodSeconds: 300
image:
tag: 3.11.6
pullPolicy: IfNotPresent
config:
cluster_name: minikube
cluster_size: 3
seed_size: 2
num_tokens: 256
max_heap_size: 512M
heap_new_size: 512M
env:
JVM_OPTS: "-javaagent:/var/lib/axonops/axon-cassandra3.11-agent.jar=/etc/axonops/axon-agent.yml"
extraVolumes:
- name: axonops-agent-config
configMap:
name: axonops-agent
- name: axonops-shared
emptyDir: {}
- name: axonops-logs
emptyDir: {}
- name: cassandra-logs
emptyDir: {}
extraVolumeMounts:
- name: axonops-shared
mountPath: /var/lib/axonops
readOnly: false
- name: axonops-agent-config
mountPath: /etc/axonops
readOnly: true
- name: axonops-logs
mountPath: /var/log/axonops
- name: cassandra-logs
mountPath: /var/log/cassandra
extraContainers:
- name: axonops-agent
image: digitalisdocker/axon-agent:latest
env:
- name: AXON_AGENT_VERBOSITY
value: "1"
volumeMounts:
- name: axonops-agent-config
mountPath: /etc/axonops
readOnly: true
- name: axonops-shared
mountPath: /var/lib/axonops
readOnly: false
- name: axonops-logs
mountPath: /var/log/axonops
- name: cassandra-logs
mountPath: /var/log/cassandra
axon-server:
elastic_host: http://axon-elastic-elasticsearch-master
image:
repository: digitalisdocker/axon-server
tag: latest
pullPolicy: IfNotPresent
axon-dash:
axonServerUrl: http://axonops-axon-server:8080
service:
# use NodePort for minikube, change to ClusterIP or LoadBalancer on fully featured
# k8s deployments such as AWS or Google
type: NodePort
image:
repository: digitalisdocker/axon-dash
tag: latest
pullPolicy: IfNotPresentaxon-server:
hosts: "axonops-axon-server.monitoring" # Specify axon-server IP axon-server.mycompany.
port: 1888
axon-agent:
org: "minikube" # Specify your organisation name
human_readable_identifier: "axon_agent_ip" # one of the following:
NTP:
host: "pool.ntp.org" # Specify a NTP to determine a NTP offset
cassandra:
tier0: # metrics collected every 5 seconds
metrics:
jvm_:
- "java.lang:*"
cas_:
- "org.apache.cassandra.metrics:*"
- "org.apache.cassandra.net:type=FailureDetector"
tier1:
frequency: 300 # metrics collected every 300 seconds (5m)
metrics:
cas_:
- "org.apache.cassandra.metrics:name=EstimatedPartitionCount,*"
blacklist: # You can blacklist metrics based on Regex pattern. Hit the agent on http://agentIP:9916/metricslist to list JMX metrics it is collecting
- "org.apache.cassandra.metrics:type=ColumnFamily.*" # duplication of table metrics
- "org.apache.cassandra.metrics:.*scope=Repair#.*" # ignore each repair instance metrics
- "org.apache.cassandra.metrics:.*name=SnapshotsSize.*" # Collecting SnapshotsSize metrics slows down collection
- "org.apache.cassandra.metrics:.*Max.*"
- "org.apache.cassandra.metrics:.*Min.*"
- ".*999thPercentile|.*50thPercentile|.*FifteenMinuteRate|.*FiveMinuteRate|.*MeanRate|.*Mean|.*OneMinuteRate|.*StdDev"
JMXOperationsBlacklist:
- "getThreadInfo"
- "getDatacenter"
- "getRack"
DMLEventsWhitelist: # You can whitelist keyspaces / tables (list of "keyspace" and/or "keyspace.table" to log DML queries. Data is not analysed.
# - "system_distributed"
DMLEventsBlacklist: # You can blacklist keyspaces / tables from the DMLEventsWhitelist (list of "keyspace" and/or "keyspace.table" to log DML queries. Data is not analysed.
# - system_distributed.parent_repair_history
logSuccessfulRepairs: false # set it to true if you want to log all the successful repair events.
warningThresholdMillis: 200 # This will warn in logs when a MBean takes longer than the specified value.
logFormat: "%4$s %1$tY-%1$tm-%1$td %1$tH:%1$tM:%1$tS,%1$tL %5$s%6$s%n"kubectl create ns cassandra
kubectl create configmap axonops-agent --from-file=axon-agent.yml -n cassandraWith locally installed helm and helmfile
cd your/config/directory
hemlfile sync
With docker image
docker run --rm
    -v ~/.kube:/root/.kube
    -v ${PWD}/.helm:/root/.helm
    -v ${PWD}/helmfile.yaml:/helmfile.yaml
    -v ${PWD}/values.yaml:/values.yaml
--net=host chatwork/helmfile syncIf you used minikube, identify the name of the service with kubectl get svc -n monitoring and launch it with
minikube service axonops-axon-dash -n monitoringFind the DNS entry for it:
kubectl get svc -n monitoring -o wideOpen your browser and copy and paste the URL.
Check the status of the pods:
kubectl get pod -n monitoring
kubectl get pod -n cassandra
Any pod which is not on state Running check it out with
kubectl describe -n NAMESPACE pod POD-NAMEOne common problem is regarding storage. If you have enabled persistent storage you may see an error about persistent volume claims (not found, unclaimed, etc). If you’re using minikube make sure you enable storage with
minikube addons enable storage-provisionerThe second most common problem is not enough memory (OOMKilled). You will see this often if you’re node does not have enough memory to run the containers or if the heap settings for Cassandra are not right. kubectl describe command will be showing Error 127 when this occurs.
In the values.yaml file adjust the heap options to match your hardware:
max_heap_size: 512M
heap_new_size: 512MReview the way you have started up minikube and assign more memory if you can. Also check the available drivers and select the appropriate for your platform. On MacOS where I tested hyperkit or virtualbox are the best ones.
minikube start --memory 10240 --cpus=4 --driver=hyperkit

Do you want to know securely deploy k3s kubernetes for production? Have a read of this blog and accompanying Ansible project for you to run.
Do you want to know securely deploy k3s kubernetes for production? Have a read of this blog and accompanying Ansible project for you to run.
Do you want to know securely deploy k3s kubernetes for production? Have a read of this blog and accompanying Ansible project for you to run.
The post Cassandra with AxonOps on Kubernetes appeared first on digitalis.io.
]]>There was a requirement by this customer to retrieve some data that was already purged due to TTL.
The post An Interesting Behaviour Observed with Cassandra Concurrent Compaction appeared first on digitalis.io.
]]>One of our customers have a short TTL for an IoT use case. The data model is a standard Cassandra time series with a sensor ID as the partition key and timestamp as the clustering column. The following CQL schema is used for this.
CREATE TABLE sensors.sensordata (
    sensor_id text,
    sensor_time timestamp,
    sensor_value int,
    PRIMARY KEY (sensor_id , sensor_time )
) WITH CLUSTERING ORDER BY (sensor_time DESC)
  AND compaction = {'class': 'org.apache.cassandra.db.compaction.SizeTieredCompactionStrategy', 'max_threshold': '32',
 'min_threshold': '8'};
There was a requirement by this customer to retrieve some data from the above table that was already purged due to TTL. In order to facilitate this request we had restored SSTable files from the production cluster backups to a separate cluster, stripping out the TTLs before loading them using the sstableloader command.
We had provisioned a cluster in AWS using EC2 i3.8xlarge instances with local NVMe volumes allocated for Cassandra data. 4 1.7TB NVMe volumes were combined into a single volume using LVM2. Apache Cassandra version 3.11.5 was used for this restoration process.
Since there were 10’s of thousands of SSTables the temporary Cassandra cluster was tasked with compaction of the newly loaded SSTables before we could query the data for specific partitions. The recommendation for concurrent_compactors is to set it to the number of CPU cores. In this case we used the value of 16, and compaction_throughput_mb_per_sec set to 0, with a view to complete the compaction as quickly as possible leveraging the CPU cores and high throughput disk bandwidth from local NVMe volumes.
Using nodetool compcationstats command we observed the number of concurrent compaction processes ramp up slowly. However, it was interesting to note that the overall compaction throughput decreased as the concurrency increased. The charts below show the system disk throughput captured during the initial compaction process. We then decreased the concurrent compactors using nodetool setconcurrentcompactors command to 4. As the number of concurrency decreased the overall compaction throughput increased again.
It is worth mentioning that there were no queries running in this cluster during this period.

The CPU utilisation ramped up as the concurrency increased, and reduced as the concurrency decreased.

IOWait remained relatively low during this period.

The charts below shows some compaction threadpool statistics.

We observed that Cassandra is unable to leverage all the available CPU cores and disk IO for compaction with by increasing the number of concurrent compactors. The optimum value for concurrent compactors appears to be below 5 in order to maintain the highest throughput offered by the available disk bandwidth.
It is important to note that this observation was only for a single table. You may still gain benefits from increasing the concurrent compactors to the number of CPU cores if you have multiple tables in your schema.

The post An Interesting Behaviour Observed with Cassandra Concurrent Compaction appeared first on digitalis.io.
]]>The post Simple tips for securing Cassandra appeared first on digitalis.io.
]]>There has been a lot of news lately around insecurity in NoSQL databases – Cassandra, Elastic, Mongo etc.. so I thought it would a good idea to write a blog outlining some good practices that can help you secure your Apache Cassandra clusters.
Firstly, let’s try and establish what we mean by a vulnerability. All software has vulnerabilities – wether its new databases like Cassandra, even with mature enterprise databases by the likes of Oracle. You should always make sure to keep your software up to date and patch when required – this includes the operating system, databases etc.
However, this is only part of the process – what is probably going to be critical is to start deploying and managing your databases in a secure fashion. My experience is that most vulnerabilities come down to how Cassandra is deployed and managed rather than some inherent security bug in the software.
Below are 9 simple tips for helping you secure your Cassandra deployment – certainly, these are not the only options, but they are easy to accomplish, with minimum cost and disruption.
Shodan actively searches various services and security vulnerabilities on public IP addresses – https://www.shodan.io/search?query=Murmur3Partitioner. There are large number of unsecured Cassandra servers found in the Shodan database. This is insanity! Databases must be placed in the deepest and darkest part of your infrastructure away from the prying eyes.
The common answers I get when I challenge people on this is “It’s just my dev environment” or “It’s only for testing” – and I like to answer “You use your laptop for development and testing, if someone stole that or destroyed it I am pretty sure you would be upset”. Your dev and test environments tell a lot about what you’re doing or planning to do – surely leaking that sort of information is never a good idea. Also, even if everything is automated and you can build it up again quickly – this costs time and money, so why do it in the first place.
This one surprises me the most – I can genuinely say most Cassandra clusters do not have authentication / authorisation enabled. Unfortunately, most people keep the default setup for Cassandra which has security disabled out of the box. However, this critical security facility is available, and you should use it (see point 1). Additionally if you are using DataStax Enterprise you can enable Kerberos, LDAP authentication, and additionally auditing.
When you enable authentication it creates a default super user “cassandra” with the password “cassandra”. Use these default credentials to setup your new super user, any additional users and roles, then quickly disable the default cassandra user.
Define a list of people and applications that need access using a table such as below:

Then convert it to CQL to apply to the cluster.
The superuser should never be used for day to day use or application use.
Remember all the above updates are stored in system_auth keyspace. This keyspace is set up by Cassandra with SimpleStrategy and replication factor of 1. Update this keyspace to NetworkTopologyStrategy with appropriate replication factor immediately.
Do not let individuals connect up with system accounts or shared accounts. Create accounts for individuals and applications to use and control the level of permissions you give them.
You can make it easy for individual people who need to connect up by creating a cqlshrc file in their home directory should they need to connect up without having to remember their credentials or pass them in via the command line.
If someone can connect up via JMX to your Cassandra they can do a lot of things – you really only want this to be done via local server access. Only change this if you know what you’re doing, understand what you opening up and spend a bit of time thinking on how to secure it.
If you can’t trust the operating system Cassandra is running on, then you have already lost. Make sure it is secured, kept up to date and looked after. There are some pretty good standard best practices on this – so familiarise yourself with them. If you don’t have any firewall control at the network level, then do it on the host – it’s not as hard as you think.
All network traffic on Cassandra can be encrypted using SSL – so use it if you need to. It can be tricky to manage, but if you have no choice then use it. Don’t forget to use a strong cipher and make sure to install the Java Cryptography Extensions.
If you’re not sure or just want a review of your setup – get some help. At digitalis.io we have a lot of experience in setting up and looking after Cassandra and DataStax Enterprise clusters. If you need any help, let us know.
“
The post Simple tips for securing Cassandra appeared first on digitalis.io.
]]>That is the past. Now there is a really handy tool called Chocolatey.
The post Install Apache Cassandra from command line on Windows appeared first on digitalis.io.
]]>In the past, Windows users had to download and run .exe or installers manually from websites. Package management was something reserved to Linux ecosystem within tools such as Aptitude.
That is the past. Now (since 2011 to be more accurate) exists a really handy tool called Chocolatey.
Chocolatey is a package manager and installer for software packages, built for the Windows platform. It is an execution engine using the NuGet packaging infrastructure and Windows PowerShell to provide an automation tool for installing software on Windows machines, designed to simplify the process from the user’s perspective.The name is an extension on a pun of NuGet (from “nougat“) as there are nougats with chocolate ingredients.
PowerShell is a task automation and configuration management framework from Microsoft, consisting of a command-line shell and associated scripting language built on the .NET Framework. One of the cool features of PowerShell: It has a powerful object-based pipeline.
Even better, since Windows 10, Microsoft has embedded to PowerShell a package manager named OneGet.
Need to figure out captions…
“OneGet is a unified interface to package management systems and aims to make Software Discovery, Installation and Inventory (SDII) work via a common set of cmdlets (and eventually a set of APIs). Regardless of the installation technology underneath, users can use these common cmdlets to install/uninstall packages, add/remove/query package repositories, and query a system for the software installed. Included in this CTP is a prototype implementation of a Chocolatey-compatible package manager that can install existing Chocolatey packages.”
On the plus side, Chocolatey integrates as well with several infrastructure automation tools such as Ansible, Puppet, Chef, SCCM…
Here you go:
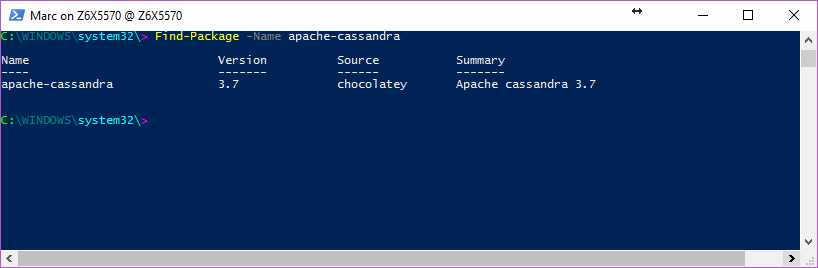
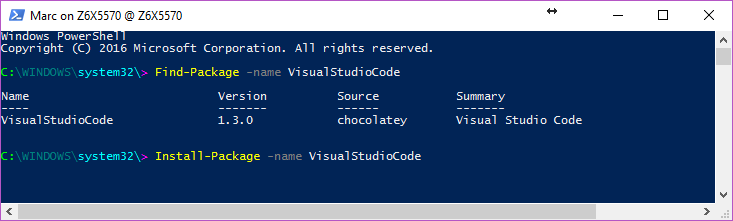
If you are using Windows 10, just use OneGet from Powershell:
Install-Package apache-cassandra
Otherwise, if you still prefer to use Chocolatey or haven’t OneGet on your client, start by installing Chocolatey using:
From Cmd.exe:
@powershell -NoProfile -ExecutionPolicy Bypass -Command "iex ((new-object net.webclient).DownloadString('https://chocolatey.org/install.ps1'))" && SET PATH=%PATH%;%ALLUSERSPROFILE%chocolateybin
From Powershell.exe (Ensure Get-ExecutionPolicy is at least RemoteSigned):
iex ((new-object net.webclient).DownloadString('https://chocolatey.org/install.ps1'))
From PowerShell v3+ (Ensure Get-ExecutionPolicy is at least RemoteSigned):
iwr https://chocolatey.org/install.ps1 -UseBasicParsing | iex
Then all you need is to type in a shell:
choco install apache-cassandra
or
cinst apache-cassandra
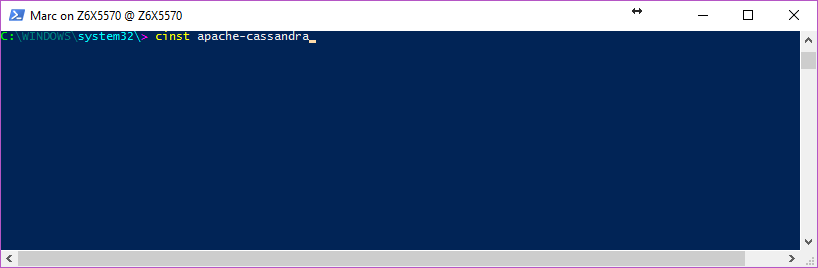
It will install Apache Cassandra on your chocolatey tools folders “C:/tools”. See? Easy.
If you are interested in this package and would like to see others versions of C* available on OnGet, let us know by sending an email or contacting us throught this git repo: https://github.com/digitalis-io/chocolatey-packages
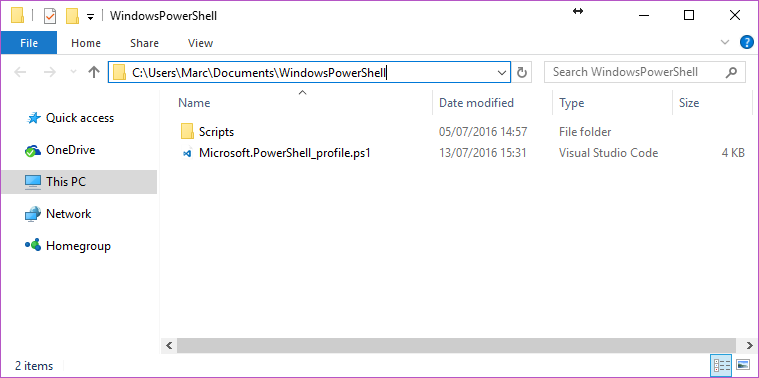
You like to use the watch command on Linux and would like to do the same on windows, just as this function to your PowerShell profile (usually located in “C:Users*yourUserName*DocumentsWindowsPowerShell”):
function watch([scriptblock]$Command_ = {Get-Process},
[int]$Seconds_ = 2){
	$private:sb = New-Object System.Text.StringBuilder
	$private:w0 = $private:h0 = 0
	for(;;) {
		# invoke command, format output data
		$private:n = $sb.Length = 0
		$private:w = $Host.UI.RawUI.BufferSize.Width
		$private:h = $Host.UI.RawUI.WindowSize.Height-1
		[void]$sb.EnsureCapacity($w*$h)
		.{
			& $Command_ | Out-String -Stream | .{process{
				if ($_ -and ++$n -le $h) {
					$_ = $_.Replace("`t", ' ')
					if ($_.Length -gt $w) {
						[void]$sb.Append($_.Substring(0, $w-1) + '*')
					}
					else {
						[void]$sb.Append($_.PadRight($w))
					}
				}
			}}
		}>$null
		# fill screen
		if ($w0 -ne $w -or $h0 -ne $h) {
			$w0 = $w; $h0 = $h
			Clear-Host; $private:origin =
$Host.UI.RawUI.CursorPosition
    }
    else {
      $Host.UI.RawUI.CursorPosition = $origin
    }
    Write-Host $sb -NoNewLine
    $private:cursor = $Host.UI.RawUI.CursorPosition
    if ($n -lt $h) {
      Write-Host (' '*($w*($h-$n)+1)) -NoNewLine
    }

    elseif($n -gt $h) {
      Write-Host '*' -NoNewLine
    }
    $Host.UI.RawUI.CursorPosition = $cursor
    Start-Sleep $Seconds_
  }
}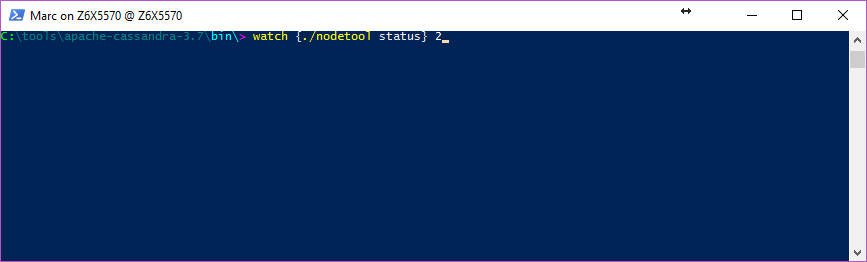
Which will execute the cassandra nodetool status command every 2 seconds:

Happy OneGetting!
If you want to understand how to easily ingest data from Kafka topics into Cassandra than this blog can show you how with the DataStax Kafka Connector.
Do you want to know securely deploy k3s kubernetes for production? Have a read of this blog and accompanying Ansible project for you to run.
Do you want to know securely deploy k3s kubernetes for production? Have a read of this blog and accompanying Ansible project for you to run.
The post Install Apache Cassandra from command line on Windows appeared first on digitalis.io.
]]>